Getting Started with JSF2-EJB3
How to Create a simple Java EE 6 Application with JSF 2, EJB3 in Eclipse and JBOSS As 7.1
Prerequisites
Before performing this project, you need to meet the following prerequisites about the projectEJB https://achrefo.wordpress.com/ejb-with-jboss-in-eclipse-luna/
Create Project Dynamic Web Project
Start by creating a new Dynamic Web Project, selecting as Target Runtime your JBoss AS 7 distribution. Click Next.
Generete web.xml and Click Finish.
Next, add the single Web page named product.xhtml
Select the template strict and click Finish
add taglig JSF : press ctrl+space to show the HTML tag proposals.
list Product
Now let’s add the manager JSF Bean which acts as a layer between the Web page and the EJB:
Since JSF 2.0 you can register your Managed Beans via annotations, this means that is not necessary anymore to use the faces-config.xml to define your beans.
Create class named ProductMB :
-add @ManagedBean must import javax.faces.beasn and add name must be a the same name in product.xhtml
-add @RequestScoped must import javax.faces.beasn
 In our class we need to creat field IProductLocal in the interface of the project EJB
to fix this issus, we need to add the prject EJB in the propriety of JSFProject.
Create two method addProduct and getListProducts
To run the project we neeed to create new EAR Application Project to deploy both the EJB Project and the JSFProject.
Create new Prpject
Run the Project EAR as Jboss Server :
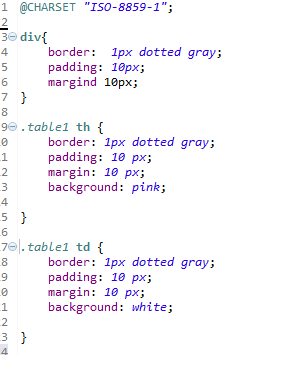
 Create simple CSS to our project :
 create file style.css in the folder webContent.
 FullPublish the Project: you should see the following :

Fine, your project is completed and should look like this in your Project Explorer window:


Leave a comment