Getting Started with Spring IOC and Spring MVC
How to Create Simple Project step by step (Spring IOC-MVC/JPA/hibernate) using Maven in Eclipse
We want to create a simple application that can manage the products and Categories , each product is defined by its part number, name, price and quantity.
The application must allow the following operation:
- Add a product/Categorie
- Remove a product/Categorie
- Update a product/Categorie
- View all products/Categories
- Check the names of the products which contain keywords.
- This application consists of three layers DAO, service, web
- It must be also closed to change and open to extension.
- The injection of the dependency will be conducted using spring IOC.
- ORM (JPA/Hibernate).
Before performing this project, you need to meet the following prerequisites:
Eclipse (Luna) Java EE IDE for Web Developers :
- Download Eclipse Luna from follownig link : https://eclipse.org/downloads/packages/eclipse-ide-java-ee-developers/lunar
- We need to install Spring Tools plug-in in the eclipse Marketplace
- Help >eclipse Marketplace > Spring Tools
Now Let’s get started
Step 1. Create a Spring Project
Open Eclipse and create new Project –> Others —> Spring Project and Next.
 Select Spring MVC Project and Next.
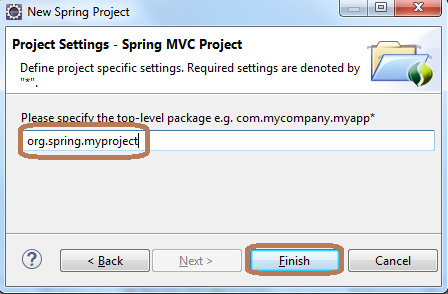
Create your package e.g. X.Y.Z and finish
Fine, your project is completed and should look like this in your Project Explorer window:
Step 2.
Open the [New Java Class] dialog box, e.g. by right clicking the new source directory node (in the [Package Explorer] window) and selecting New > Class.
Create new Class Product and Category in the package X.Y.Z.entity
 Class Product have an id Product,name,price and quantity an then generate the getter and setter
 Also we need to generate constructor with paramater and a constructor without paramater:
 Deslect the id Product in the constructor with paramter because JPA we will generate auto increment.
 Add dependency Hibernate and JPA to file pom.xml
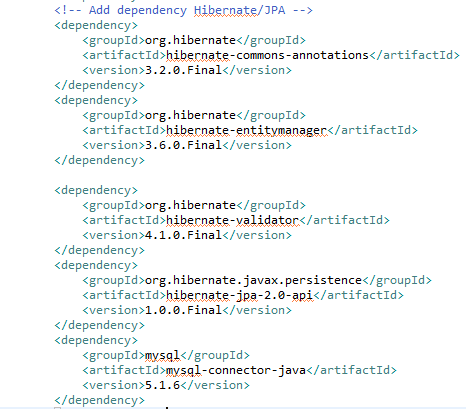 Let’s create an entity describing a product add the annotation to our class Product !
 the entity class product have a join column to the category with the relation Many to One
 Class Category have an id Category,name,description and a collection of product
-Generate the getter and setter.
-Generate constructor with paramater and a constructor without paramater.
 The entity class Category have a relation ship with a collection of product One to many
We also need to configure JPA by setting a META-INF/persistence.xml file:
- Right click the src/main/resources node (in the [Project Explorer]) and select New > XML File
 The parent folder should be resources.
The name of the file is persistence.xml and Next.
 Create XML file from an XML shema file.
 Select /persistence/persistence_2.0.xsd
 Delete if you want the prefix persistence .
 Click Finish to creat the file XML persistence.
 Add persistence unit name and transactional type is RESOURCE _LOCAL
Add the provider is our case is hibernate and some property to show sql in the console and to create our database.
if you want add the hibernate dialect in our case is MySQLDialect.
Add dependency Spring and I update the version fo spring to 3.2.2.RELEASE i
 Now we need to create Spring Configuration Bean file in the folder Resource:
Select Spring Bean Configuration File
 Our file xml named applicationContext.xml
 Select the namespaces context and tx
 Create a bean named datasource with the property driverClassName, url, username and password
 Create a bean persistence Unit Manager
 Create a bean entity Manager Factory
 Also we need a bean transaction Manager
![]() Add the context annotation config
Add the context annotation config
![]() We will use the Junit to test the entity class:
We will use the Junit to test the entity class:
 Create a class TestDB
 In the method test we create a Class Path to our applicationContext.xml and test it if we have an exception.
 Before you Test your class with Junit
Dont forget to create a database and in our project name : myDB
Run the class as TestJunit
Good !!
Our table product and category was created
Create Interface Product DAO
 Create Class Product implements interface Product DAO
Prepares an EntityManager automatically and injects it into the em field (because it is annotated with the @PersistenceContext annotation).
Now replace the content of the new source file with the following code:

 Create interface Product Service :
 The interface Product Service contains the same methode in the interface ProductDAO so just copy the methode and past it in the interface and then create a class ProductServiceImpl that implements all the methods.
We added annitation Transactional in our entity class because Spring will occupeted about the transactional.
we use also a filed dao in the interface ProductDAO and generate a setter because the spring use it when we create bean in the applicationContext.
Handles transactions automatically for methods that are annotated with the @Transactional annotation, saving the need to wrap every operation that modifies the database by transaction begin and commit.
 Create bean dao and bean service with reference dao that we declare in ProductServiceImpl.
Now we will test our DAO with simple Test Junit
add new category and product
view list of the product and the category:  Run the class as Junit Test , in the console output you should see the following
You’ve written a simple application that uses Spring IOC/ JPA to save objects to a database and to fetch them.
Next Step we will create the package Controller and use Spring MVC.
Step 6.
Create Class Product Controller in the package controller
we add a new method index to test the view
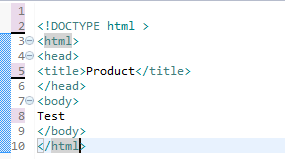
Create page JSP named product same as return “product”
Juss we add in body Test to show the result in
Add the project on the server
Run the server and show the result at localhost:8080/myproject/index
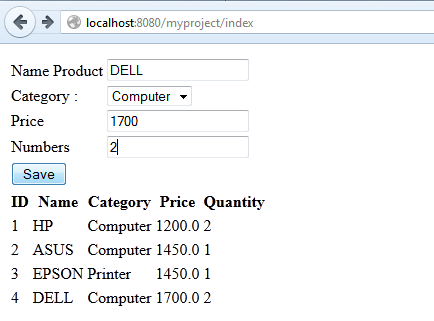
 we want to show in the index new product and list of the product
Before your run the server,we need to modify the web xml and add the file applicationContext in the context paramter.
 add the form , we specified the modelAttribue named product
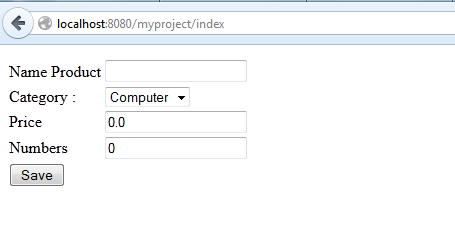 add another div contains a table to show list of the product
 Just refresh the page and show the list of the prducts
 add new method saveProd to add new product with value /saveprod
 Restart the server because we modify the class java Product Controller and add new product
add simple css to produt jsp
 Restart the Server and show the new simple css.
Create two methods to edit and delete a product.
 modify the code JSP in the div list product and add a link a href to delete and to edit a product
The product was updated with success








Leave a comment